This article is intended to share a streamlined approach for managing Office 365 services via PowerShell which are pertinent to the Microsoft UC platform, namely Exchange Online, Skype for Business Online, and Microsoft Teams. Covered are a host of one-time installation steps needed to prepare a single workstation with the requisite software as well as the individual PowerShell cmdlets repeatedly used to invoke access to each service when management processes need to be run.
Before jumping into how to connect a single PowerShell window to all of these UC-related services online it is important to understand the different services and what has changed over the years in terms of PowerShell behavior.
Background
There are several different articles available providing guidance for connecting to the various Microsoft Office 365 Online services via PowerShell. They range from examples like an older blog post written specifically for Lync Online to new, updated guidance from Microsoft on how to access multiple services in a single console. The older approaches utilized the original requirements of manually downloading and installing several different PowerShell modules via traditional Windows Installer packages which were created for connecting to services like Lync Online and Exchange Online. There even use to be a separate download required simply to authenticate into Office 365 first using the original Organizational ID (Org ID) online authentication model.
Now though, most of the various services in Office 365 are easier to connect to via PowerShell for management purposes, but they are still not all using the same methodology and installation processes. While most are updated to use basically the same process there are a few outliers. To access Exchange Online and/or the Office 365 Security & Compliance Center a completely different approach was used than the rest of the PowerShell modules used for managing services to Azure Active Directory (Azure AD), Skype for Business Online, or Teams.
Of the more recent changes which improve upon and simplify the overall management experiences there are two primary concepts worth calling out. One is the creation of a central repository for PowerShell resources and the other is the inclusion of Modern Authentication. The newer PowerShell Gallery is now used to store and distribute various modules making installation and updates of future module version much easier. Also by leveraging Modern Authentication each of these modules utilize the same approach for providing administrative credentials for access.
The Modules
Yet, as mentioned earlier not all of these services operate identically and there are even some overlapping modules used for accessing the core Office 365 service
The following core modules are needed for managing any underlying Azure AD accounts or tenant components:
- Microsoft Azure Active Directory Module for Windows PowerShell – This module contains the original set of *-Msol* cmdlets for managing Azure AD. This is the older v1 PowerShell module referred to as MSOnline.
- Azure Active Directory PowerShell for Graph – This module is the newer v2 module containing all of the *-AzureAD* cmdlets for managing Azure AD. This is the newer v2 PowerShell module referred to as AzureAD.
Microsoft currently recommends using the newer v2 module, but that does not currently include any of the cmdlets provided in the v1 module. So, it is not feasible to simply use only the newer Azure AD module when it does not also include all the older functionality. For many of the management tasks covered on this blog for services like Skype for Business it is still required to execute several MSOnline cmdlets, thus both the v1 and v2 would be leveraged. In fact, only the v1 module is really needed in most of the currently documented Skype for Business configuration and management processes as they all utilize the -Msol cmdlets, and not the newer -AzureAD cmdlets. If in the future some of that guidance is updated then make sure to leverage the appropriate modules.
Luckily both of the cmdlets above can easily be installed form the PowerShell Gallery so inclusion of both is trivial and essentially there is no harm in loading an additional module into a PowerShell session even if no cmdlets from that module are executed.
The following two modules are handled completely differently from the modules above though as they are not available via the PowerShell Gallery and must be installed through two separate manual processes.
- Skype for Business Online PowerShell – This module contains all of the *-Cs* cmdlets originally added for managing Lync Online, now Skype for Business Online, and also includes UC-related Microsoft Teams management cmdlets.
- Exchange Online PowerShell – This newer module with Modern Authentication support contains all of the cmdlets used for managing Exchange Online but these cmdlet names do not share a common naming convention for easy identification.
Installation
The following steps walk through importing or installing each individual PowerShell module and are required only once per workstation. An up-to-date Windows 10 workstation was used which contains all of the prerequisite Windows components to successfully complete the process. If any errors occur when using older versions of Windows then it may be needed to updated components like PowerShell or Windows Management Framework.
MSOnline
Installation of the first module will assume that no other PowerShell modules have ever been installed on the specific workstation and will prompt for the one-time installation of the NuGet Package Provider as well as ask to temporarily trust the PSGallery repository.
- Launch Windows PowerShell as an administrator.
- Enter the following cmdlet to install the MSOnline module on the local workstation directly from the PowerShell gallery.
Install-Module -Name MSOnline
- When prompted to install the prerequisite NuGet provider enter “Y” to allow the installation.
- When prompted to install the untrusted repository enter “A” to allow the installation.
- To verify successful installation of the both the requisite NuGet and PSGallery components as well as the desired MSOnline module run the following cmdlets to list the installed PowerShell Package Providers, Repositories, and Modules.
Get-PackageProvider
Get-PSRepository
Get-InstalledModule
Note that the PSGallery repository listed above is currently set as Untrusted. While this is acceptable it will continue to trigger the ‘untrusted repository’ prompt seen earlier when attempting to install any other modules from the PowerShell Gallery. At this point it may be preferred to configure this as a trusted repository on the specific workstation to further streamline additional module installation. This is a completely optional step, but one that is typically recommended give the PowerShell gallery is a trusted Microsoft source.
- Use the following PSRepository cmdlets to set the PowerShell gallery to trusted and then confirm that modification.
Set-PSRepository -Name PSGallery -InstallationPolicy Trusted
Get-PSRepository
Azure AD
- In the same administrative PowerShell window issue the following cmdlet to install the AzureAD module.
Install-Module -Name AzureAD
If the PSGallery repository was not manually trusted using the optional step above then the step above will again prompt for access to the still untrusted repository in order to download the AzureAD module. If this prompt appears enter “A” to allow it.
- Use the Get-InstalledModule cmdlet again to verify that AzureAD module has been installed.
Get-InstalledModule
Skype for Business
- Download and install the latest version of the Skype for Business Online Windows PowerShell Module.
- If the installation fails with an error reporting an insufficient or missing version of the Visual C++ 2017 x64 runtime then download and install the latest version of the x64 redistributable package (e.g. vc_redist.x64.exe).
- To verify successful installation open Apps & Features under the Windows System Settings and then search for ‘Skype’ to filter out of the list of installed programs to display the following results.
Exchange Online
- Using Microsoft Edge (other browsers may not be compatible) sign-in to the Microsoft 365 Admin Center using an administrator account and then navigate to Admin Centers > Exchange to open the Exchange Admin Center in a new browser window.
- Select Hybrid from the navigation pane and then click Configure under “The Exchange Online PowerShell Module supports multi-factor authentication. Download the module to manage Exchange Online more securely.“
-
- Open the Microsoft.Online.CSE.PSModule.Client.application and then select Install when prompted.
- Once the module installation completes then simply close the Windows PowerShell window which was automatically opened.
At this point all four PowerShell modules have been installed on the workstation and the one-time setup is complete.
Usage
The following cmdlets can be issued individually to establish connections into each desired online service via PowerShell. Due to the way that the Exchange module functions though it is critical to use the Exchange PowerShell module to start with as that module cannot be utilized in a standard PowerShell window.
This approach leverages support for Modern Authentication throughout all four modules which does not utilize a single stored set of credentials. Each connection will prompt for authentication in a separate window.
Connecting to Online Services
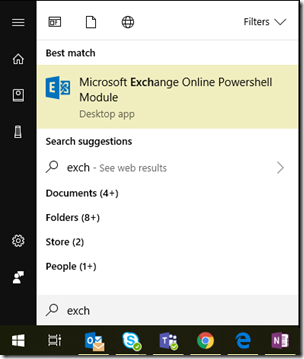
- Launch the Microsoft Exchange Online PowerShell Module which was just installed on the workstation in the previous step.
-
Connect to Exchange Online by using the Connect-EXOPSSession cmdlet.
Connect-EXOPSSession
-
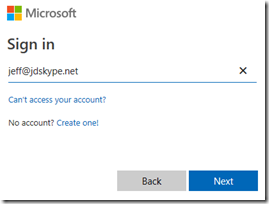
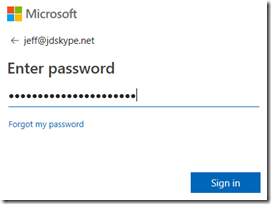
Sign in using an administrative account for the tenant.
Once the session has been imported a warning may appear related to potentially unapproved verbs which can be ignored.
- Connect to Azure AD using the Connect-MsolService cmdlet and enter the same administrator credentials when prompted.
Connect-MsolService
- Connect to Azure AD using the Connect-AzureAD cmdlet, again entering the same credentials if prompted.
Connect-AzureAD
- Connect to Skype for Business Online using the following cmdlets, providing the account username when prompted in-line and the account’s password when prompted by a separate window.
Import-Module SkypeOnlineConnector
$skype = New-CsOnlineSession
Import-PSSession $skype
If all commands were successful then the resulting PowerShell window should look something like this:
Testing Connectivity
Issue the following four example cmdlets to test that each of the four modules are functioning properly with access to the online services.
Get-Mailbox
Get-MsolAccountSku
Get-AzureADUser
Get-CsOnlineUser
Quick Reference
The following can be inserted into a .ps1 file to create a basic batch process for connecting to all four services in succession. Due to the way that Modern Authentication does not allow token sharing between the various modules then the authentication prompts will still appears between each connection attempt. Some of the Connect cmdlets support providing the User Principal Name in-line while others do not. To attempt to incorporate these newer modules into custom scripts to further automate the process take a look at these other blog articles.
Connect-MsolService
Connect-AzureAD
Connect-EXOPSSession -UserPrincipalName “jeff@jdskype.net”
Import-Module SkypeOnlineConnector
$skype = New-CsOnlineSession -UserName “jeff@jdskype.net”
Import-PSSession $skype
Make sure to execute the script after launching the Microsoft Exchange Online PowerShell Module, as that is the only PowerShell instance which is capable of using the Connect-EXOPSSession cmdlet.


Hi Jeff ,
Is there any way we can find the IP address of the Polycom CS 500 and 600 Phones IP address ? I have an issue of Time showing one hour ahead of the configured time zone /ntp. NTP server showing correct IP but phones displaying wrong IP how to correct the same on the old polycom phones ?
Great article. Just curious if you ever faced an issue with moving SFB on-prem user to SFBO via Powershell while MFA is enabled and forced?
I haven’t but I’ve seen that can be problematic.
Very good and comprehensive article. Most of it I was able to complete successfully. I was able to create the Exchange connection using a test user with global admin rights but when I executed the cmdlets Connect-MsolService and Connect-AzureAD I got error messages (showing the one for Connect-MsolService:
The term ‘Connect-MsolService’ is not recognized as the name of a cmdlet, function, script file, or operable program. Check the spelling of the name, or if a path was included, verify that the path is correct and try again.
So I opened a new Powershell window and checked for the installed modules. Both AzureAD (2.0.2.4) and MSOnline (1.1.183.17) are there. Might it be the problem that I also have Az (0.5.0) and AzureRM (6.12.0) installed? The only Connect cmdlets that are shown (via TAB) are Connect-AzAccount and Connect-AzureRMAccount.
And when I run Get-Packageprovider I only see NuGet and PowerShellGet, not the other package names shown in your article (msi, msu, Programs).
Any suggestion how to proceed? It is all in a test environment so I can try any suggestion. Thank you in advance
Just wanted to say many thanks. Recent updates broke my ability to connect to AzureAD, with unhelpful errors (bad username or password), and running the Exchange Ad module first has got it woking again. Kudos! On a related note, you can use the following to import the Exchange module and a session into Powershell ISE after installing it:
Import-Module $((Get-ChildItem -Path $($env:LOCALAPPDATA+”\Apps\2.0\”) -Filter Microsoft.Exchange.Management.ExoPowershellModule.dll -Recurse ).FullName|?{$_ -notmatch “_none_”}|select -First 1)
$EXOSession = New-ExoPSSession
Import-PSSession $EXOSession
[…] the PowerShell commands shown in this article one or more PowerShell Online modules will need to be setup on the workstation, if not already configured. One potentially confusing concept in this […]
Hi Jeff,
Thanks for the great article. Wanted to give a suggestion on making the batch process a bit faster and remove the need to fill out four separate credential prompts. All four connection cmdlets support -Credential switch, so you can just add this cmdlet to the beginning of the batch and then use the saved credentials with all four connections
$creds = Get-Credential
Also, if modern auth is not needed, New-PSSession can be used connect Exchange Online instead of the Exchange Online Module.
$ExcSession = New-PSSession -ConfigurationName Microsoft.Exchange -ConnectionUri `
https://outlook.office365.com/powershell-liveid/ -Credential $creds -Authentication Basic -AllowRedirection
Import-PSSession $ExcSession
Kris, yes, that is the older options and is what I used in a previous article, but the Get-Credential approach doesn’t work with Modern Authentication for Exchange (as you state) or Skype for Business. The intent here was to use the latest process and leverage Modern Auth across the board, and I’ve yet to figure out a way to cache creds to pass to each module when prompted via Modern Auth.
[…] import the Skype for Business Online module (if installed) as outlined in numerous articles like this. Then list out the available cmdlets in the imported module that match the ‘TeamsIPPhone’ […]
[…] the steps in the Managing Office 365 with PowerShell article and then connect to both Exchange Online and the MSOnline modules as instructed. […]
Hi Jeff, just followed all your steps and was able to connect all 4 services.
The Get-CsOnlineUser cmdlet works fine, but when trying to Set-CsUser for different settings we need i receive the notification, this cmdlet isn’t available. I searched the internet and found some entrys, but i do not understand what to do now.
I also unsure, if the skype online connector is installed well, when i try to import it, nothing really happens and in the windows search field i do not find it.